

How to Create Saved Filter Views
Save the filters you use most as a named view, so you can apply the whole combination again in one click.
-
Go to any screen with filters
Open a page that has a Filters button, such as Tasks, Reservations, or Properties.
-
Select the filters you want
Choose filters like relative dates and property groups. The options change based on the screen you’re on.
-
Click “Save as…”
Once at least one filter is active, a Save as… button appears in the filter bar. While a saved view is selected, Save as… sits in the saved-view bar above the list instead, so you can save a copy under a new name.
-
Name the view and choose who can use it
Enter a name, then choose a Visibility: Organization makes the view available to everyone in your organization, and Private keeps it visible only to you.
-
Click Save
The view is saved and appears under Saved Views in the Filters menu.
Using and managing saved views
Section titled “Using and managing saved views”Open Filters and select Saved Views to see your views. Click the star next to a view to add it to your favorites.
To update a view, select it, change its filters, and click Save in the saved-view bar. The bar shows Unsaved changes until you do.
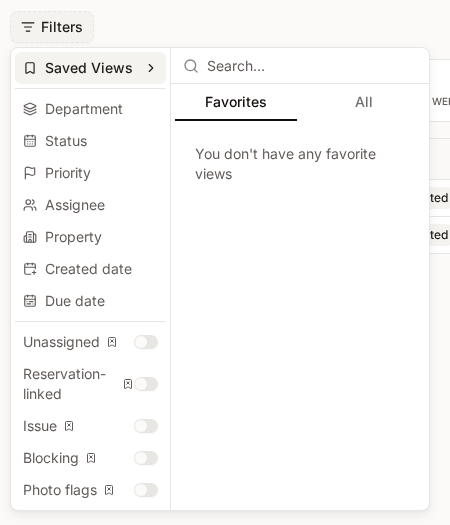
The menu next to each view offers:
- Set as default — the view is applied automatically when you open that screen. Select Remove default to stop.
- Edit — change the view’s name or visibility.
- Delete — permanently remove the view.
Other members of your organization can edit or delete an Organization view, not just the person who created it, so a view you share can be changed or removed by a teammate. Only you can change a Private view.