How to Create Points of Interest Guides
Here’s a quick guide on how to create Points of Interest Guides in SuiteOp. Follow these instructions to learn how to add new guides, fill in guide details, and customize guide settings.
-
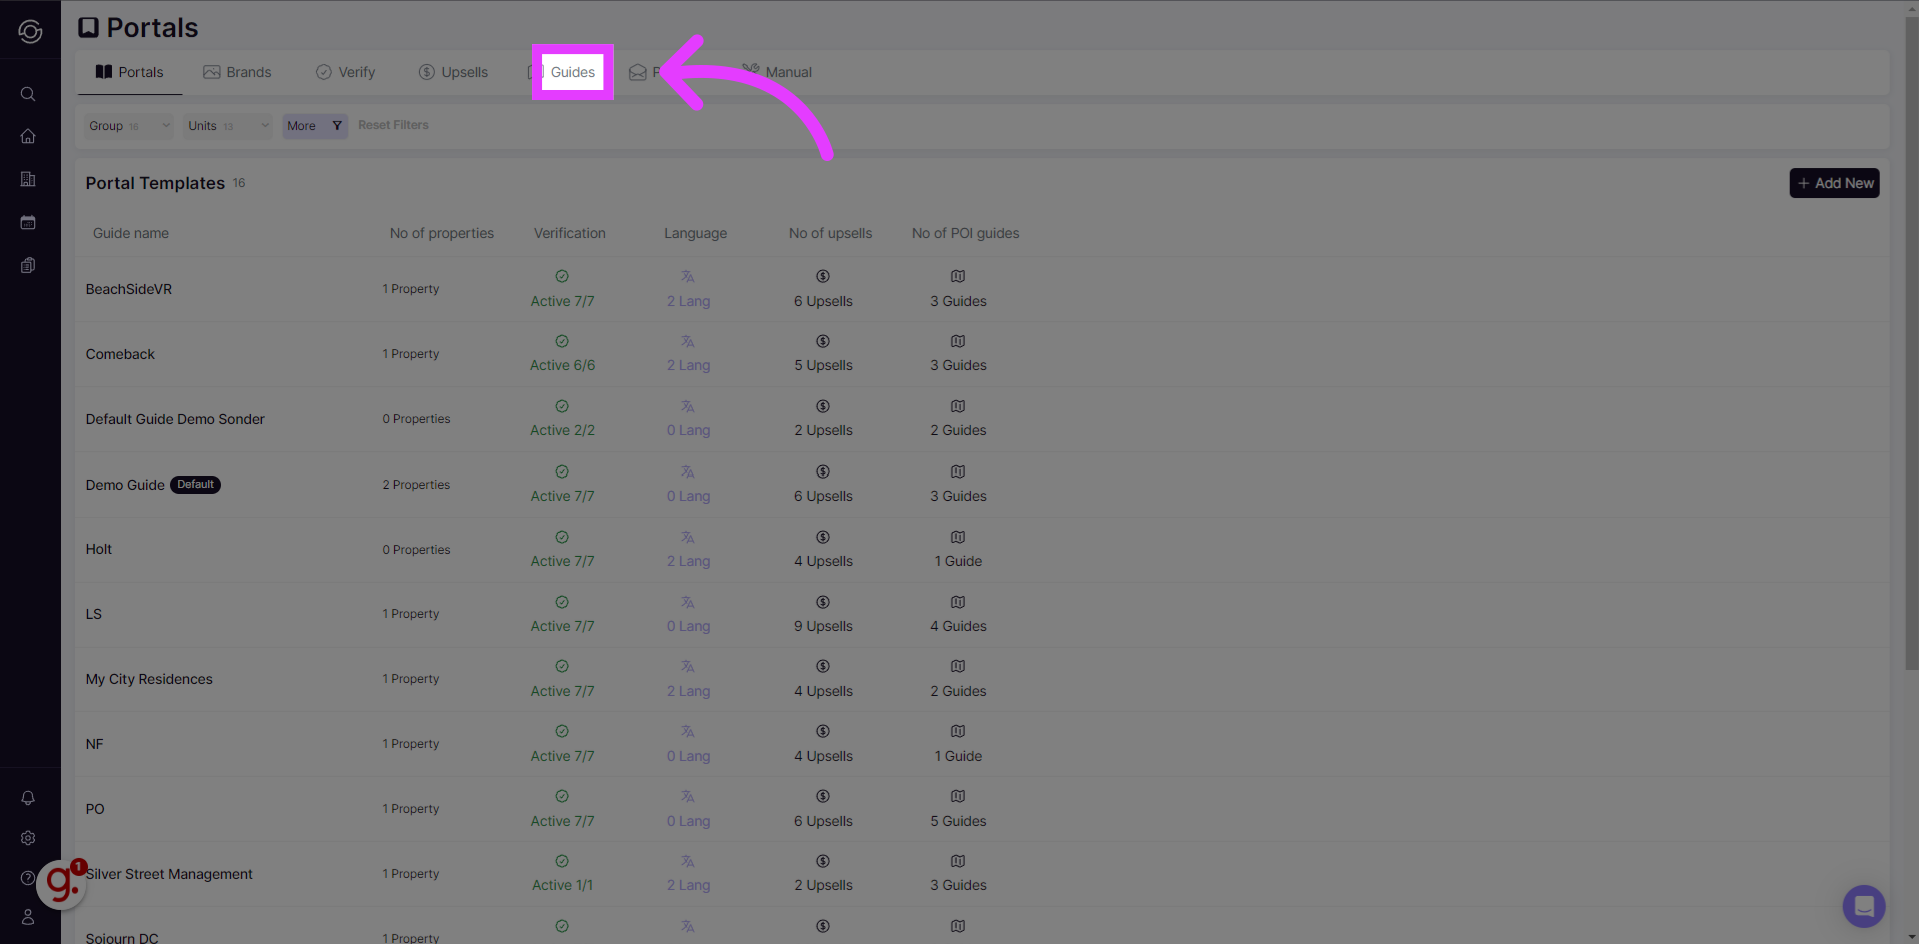
“Guides” Tab
On the Portals page, navigate to “Guides” section
-
Add / Select New Guide
You’ll find the existing guides, but you also have the choice to create guides for your property by selecting “add new.”
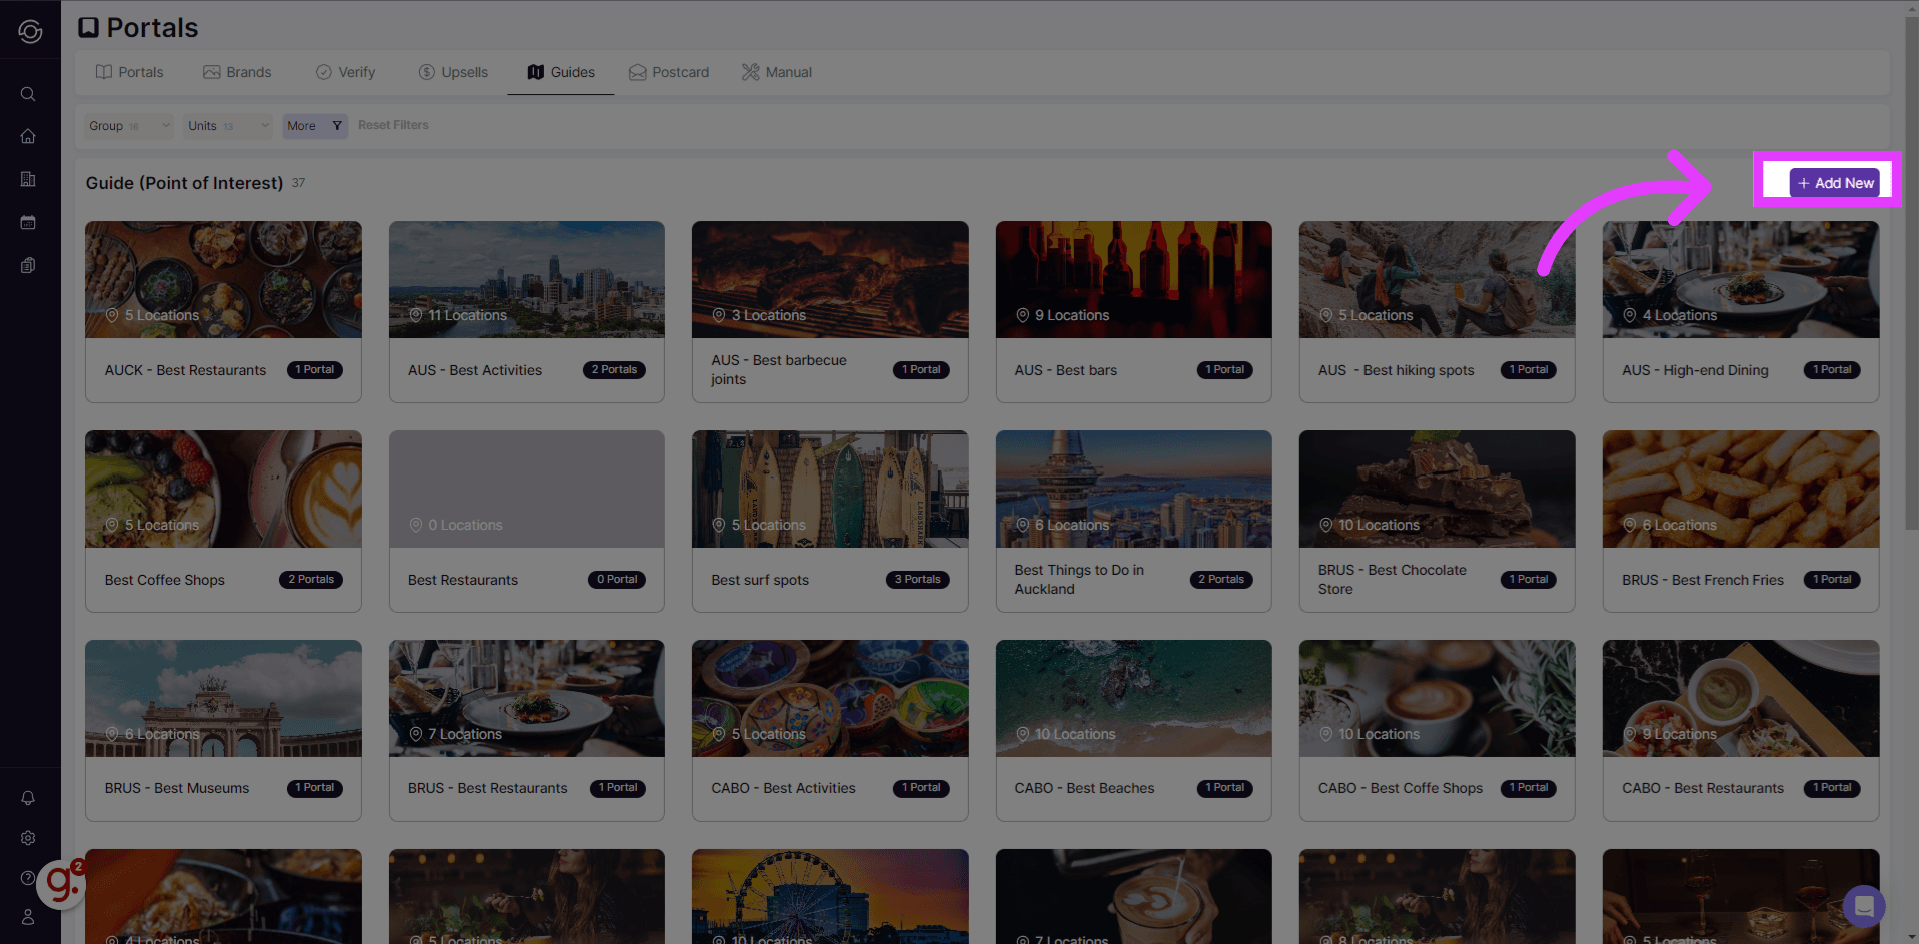
We recommend breaking out your Guides per category: NYC Coffee Spots, NYC Dinner, NYC Tours, etc.
-
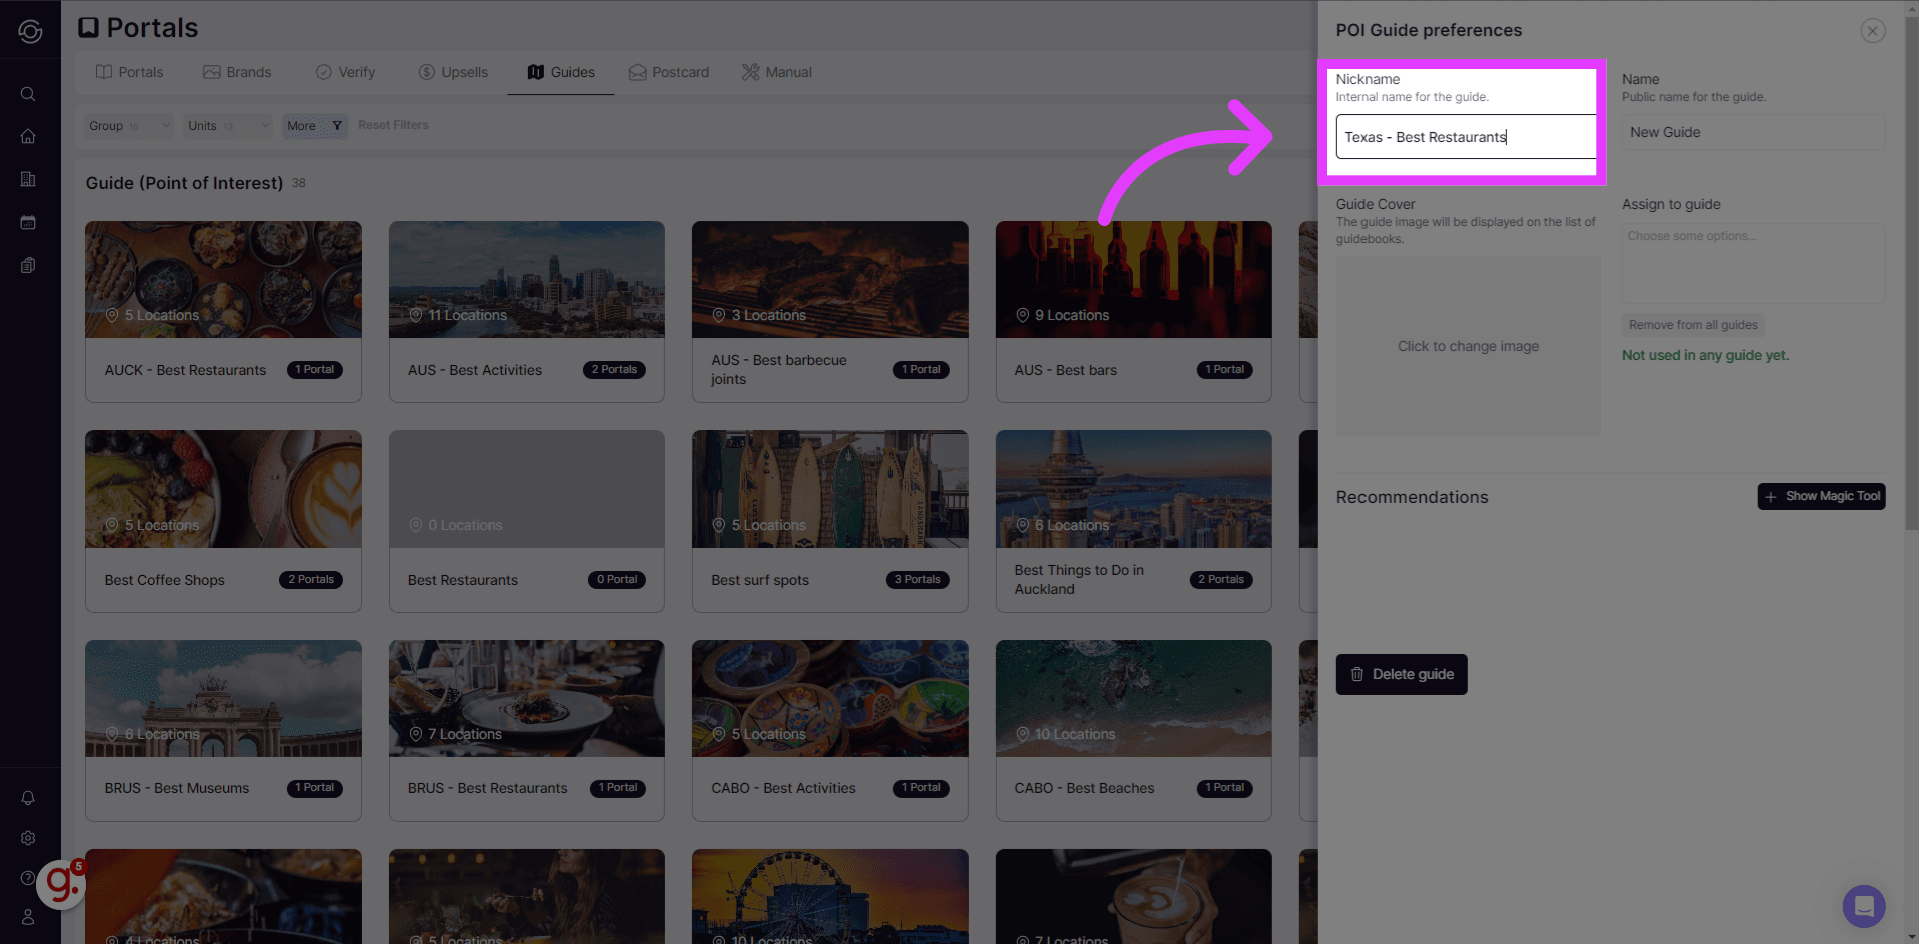
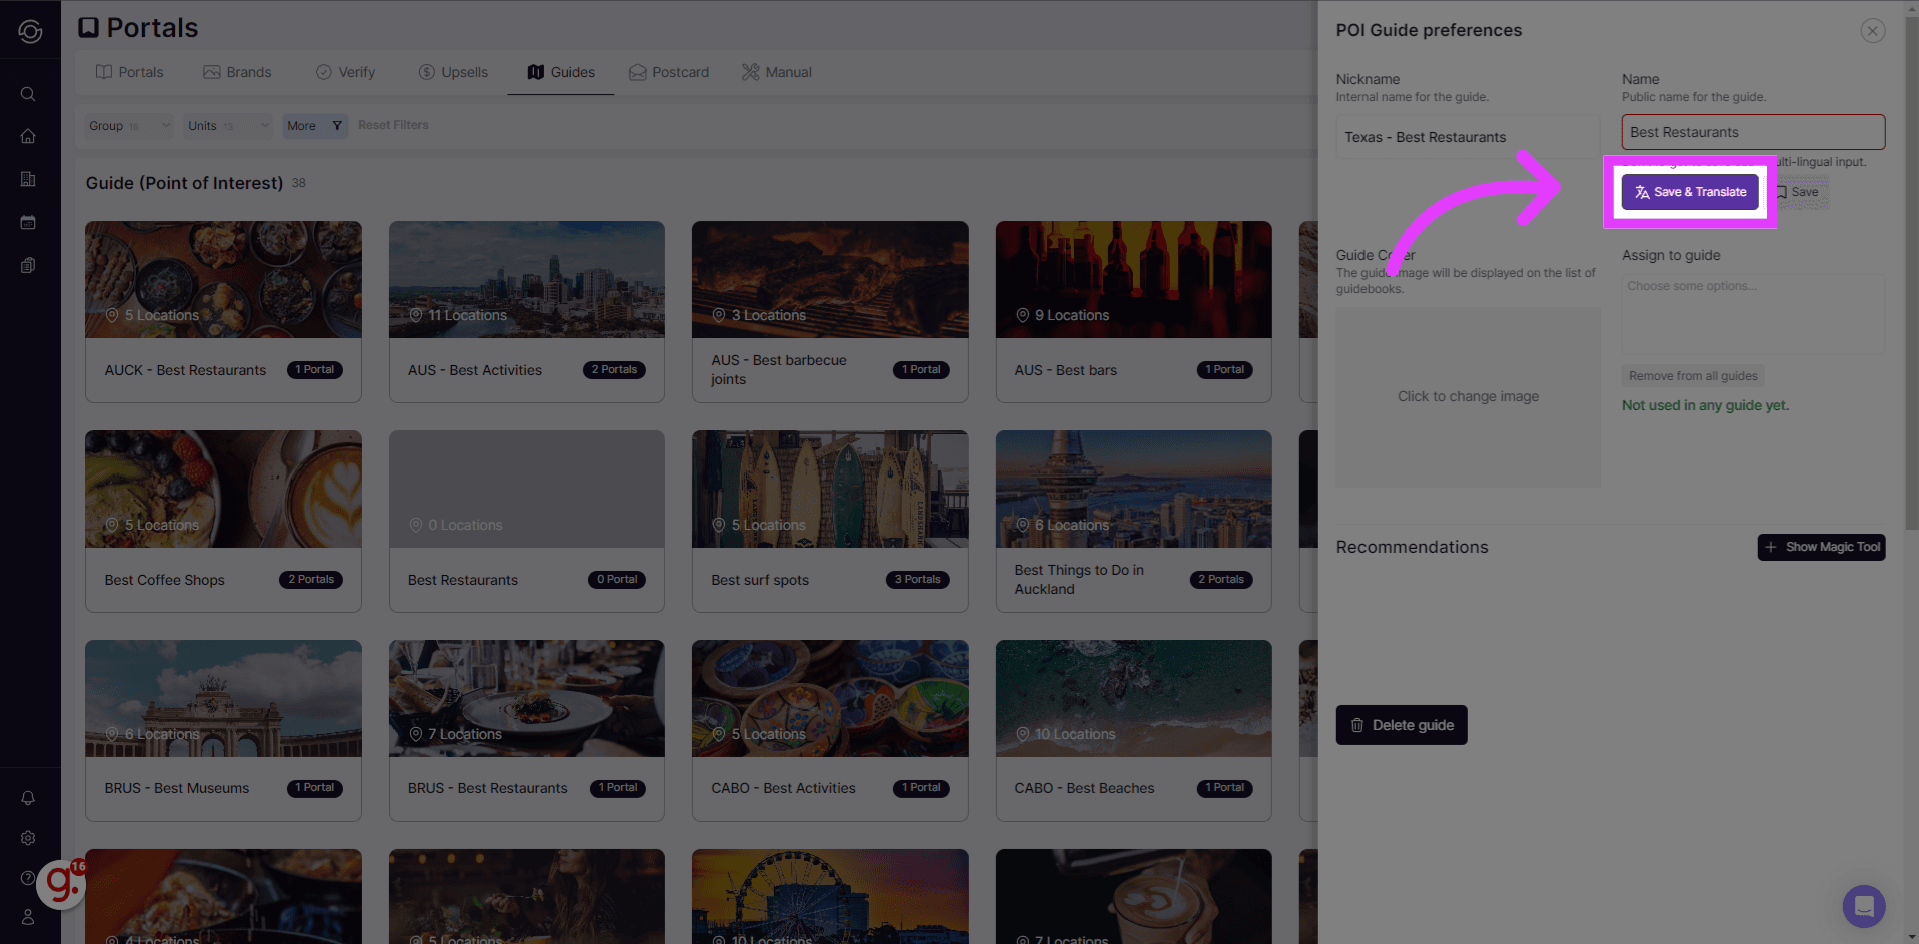
Add Nickname for the Guidebook
Input a nickname for your guide, this will be visible to your internal team.
-
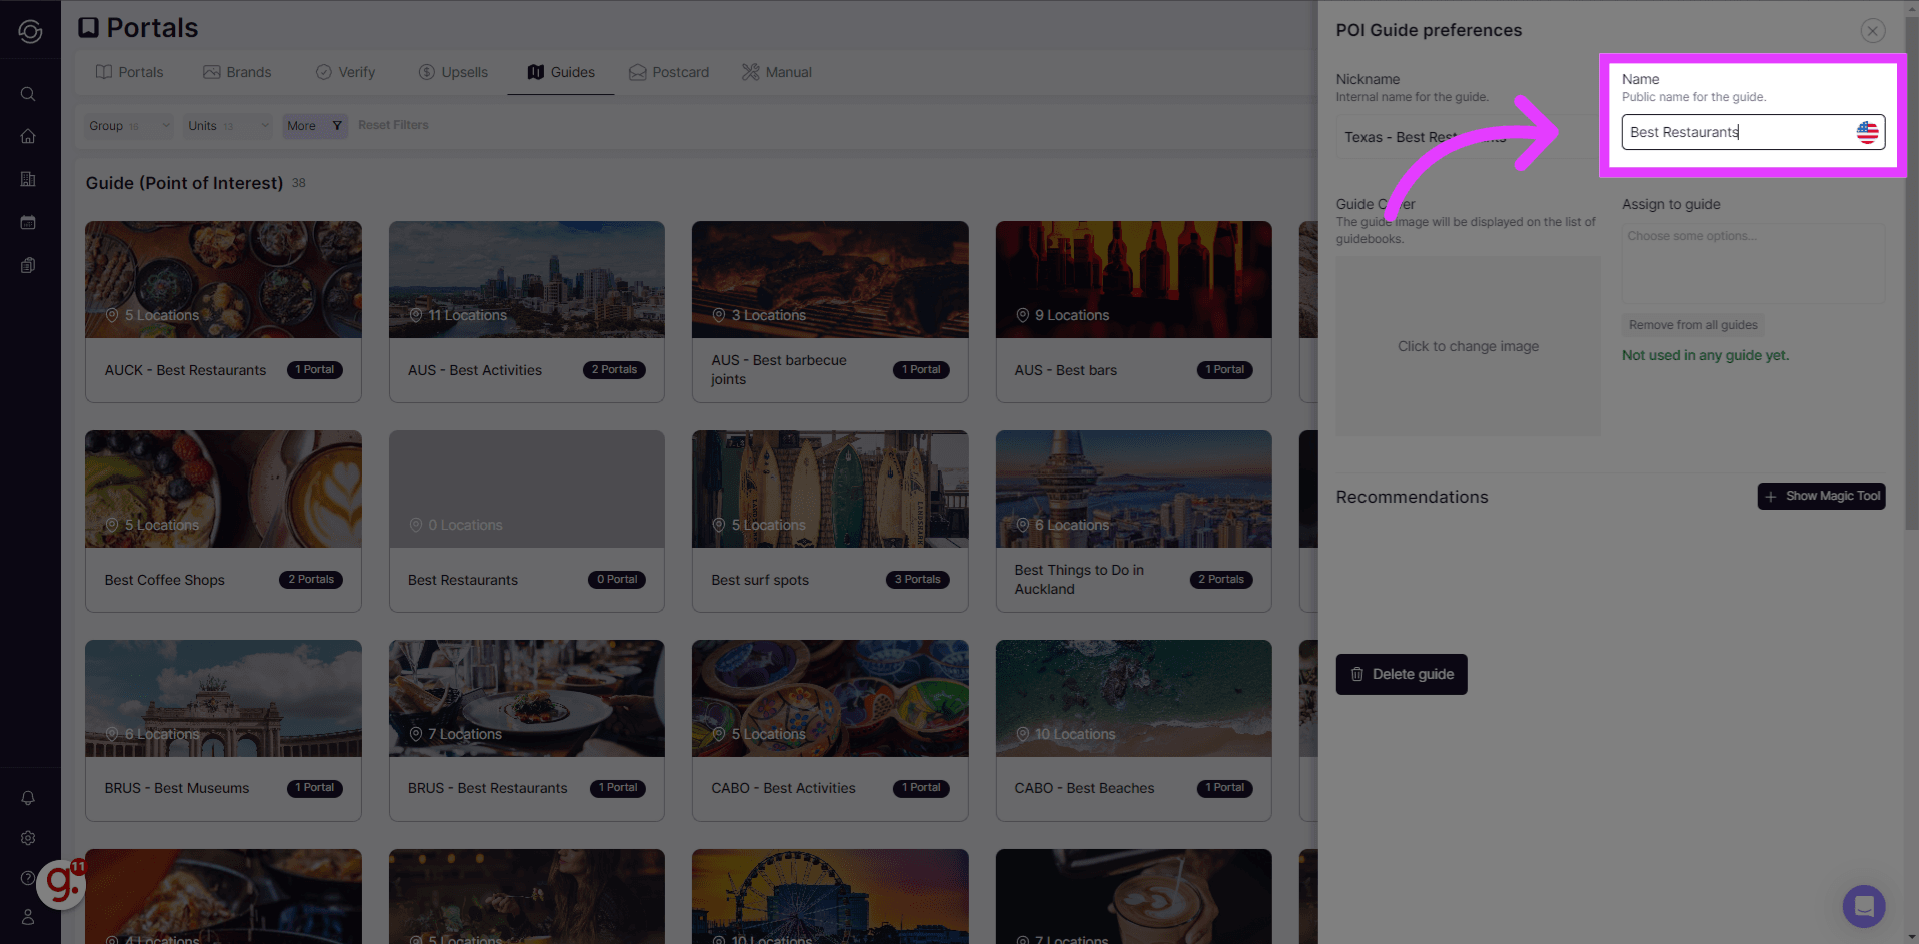
Label the Guidebook
Input a name for your guide that will be visible on the guest portal.
-
Save Changes
Select “Save and Translate.” This action will save all the entries.
-
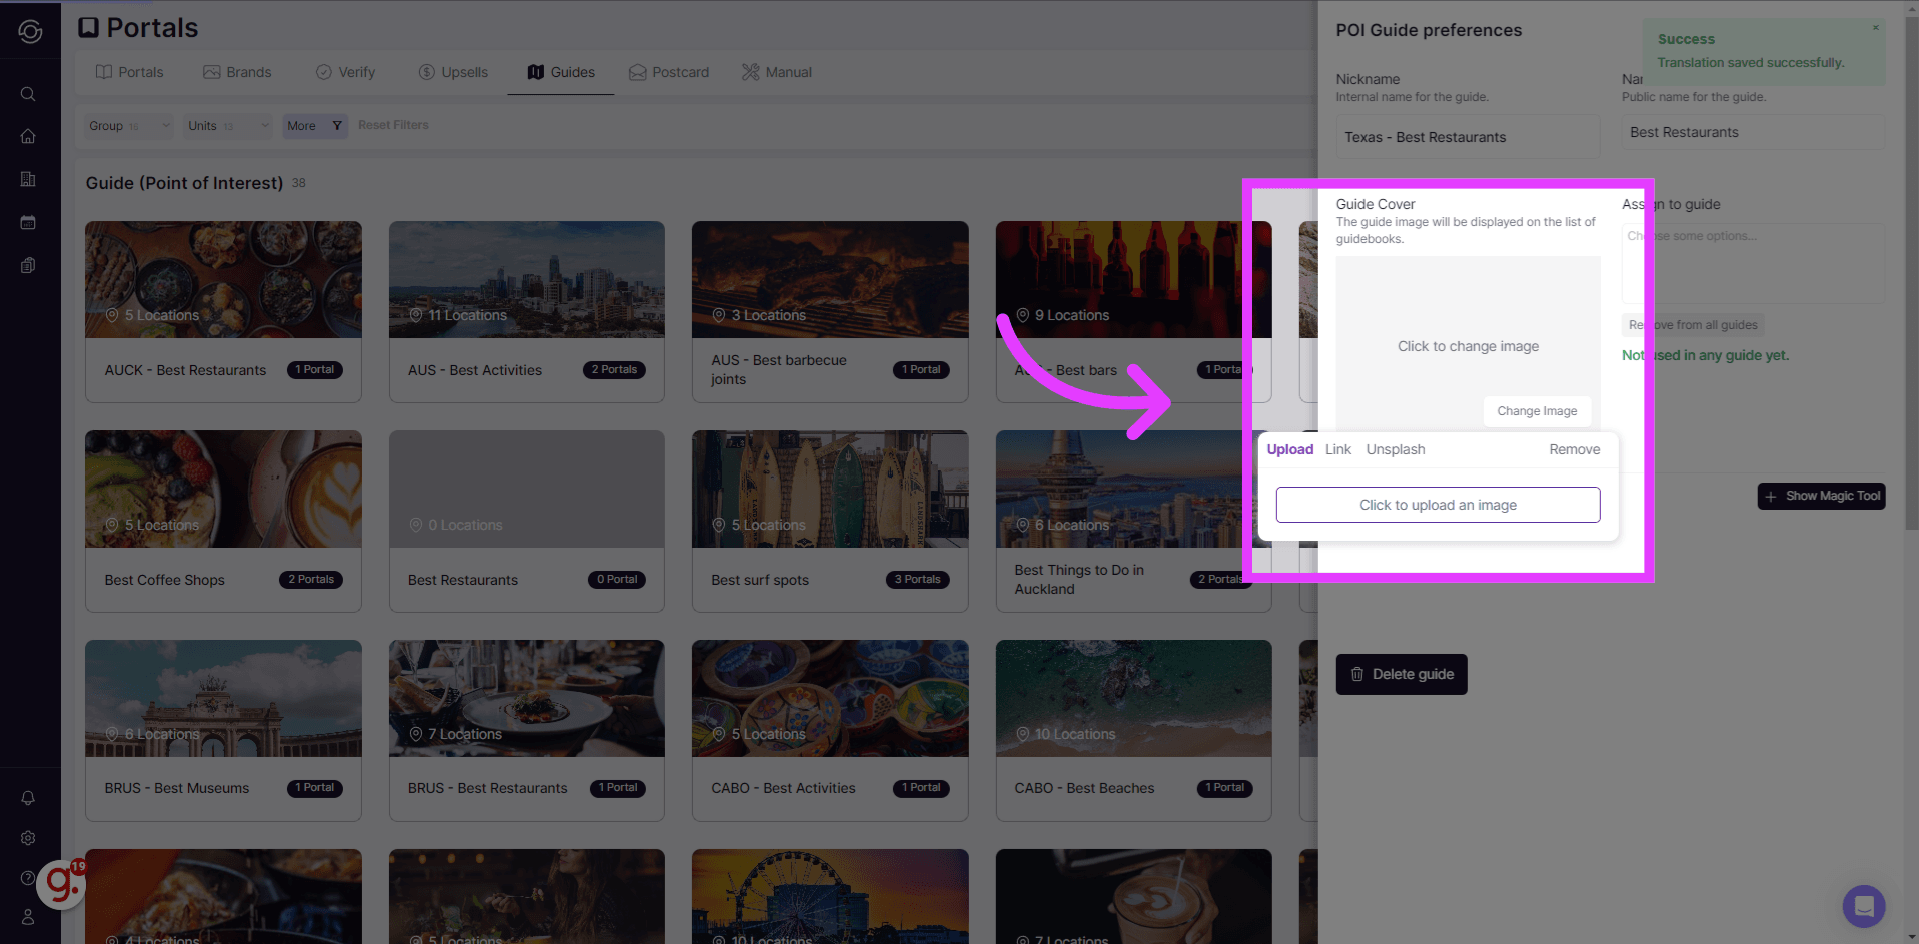
Cover Photo
Upload a cover photo.
-
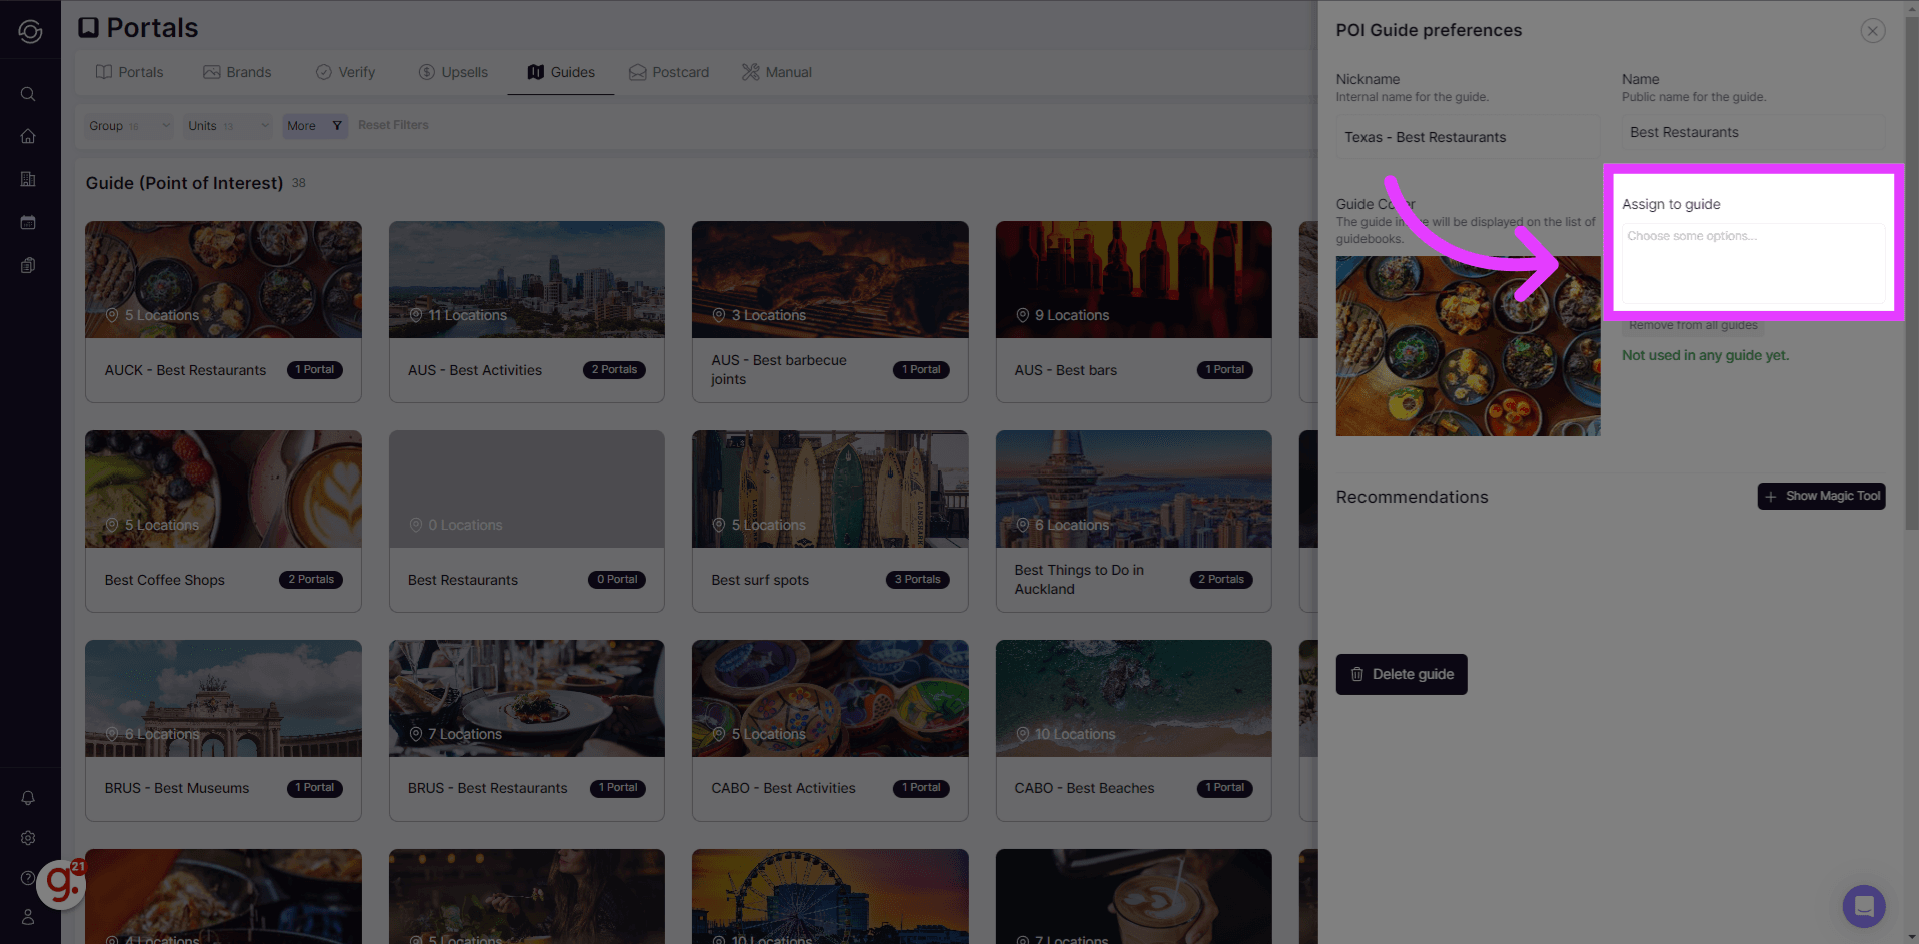
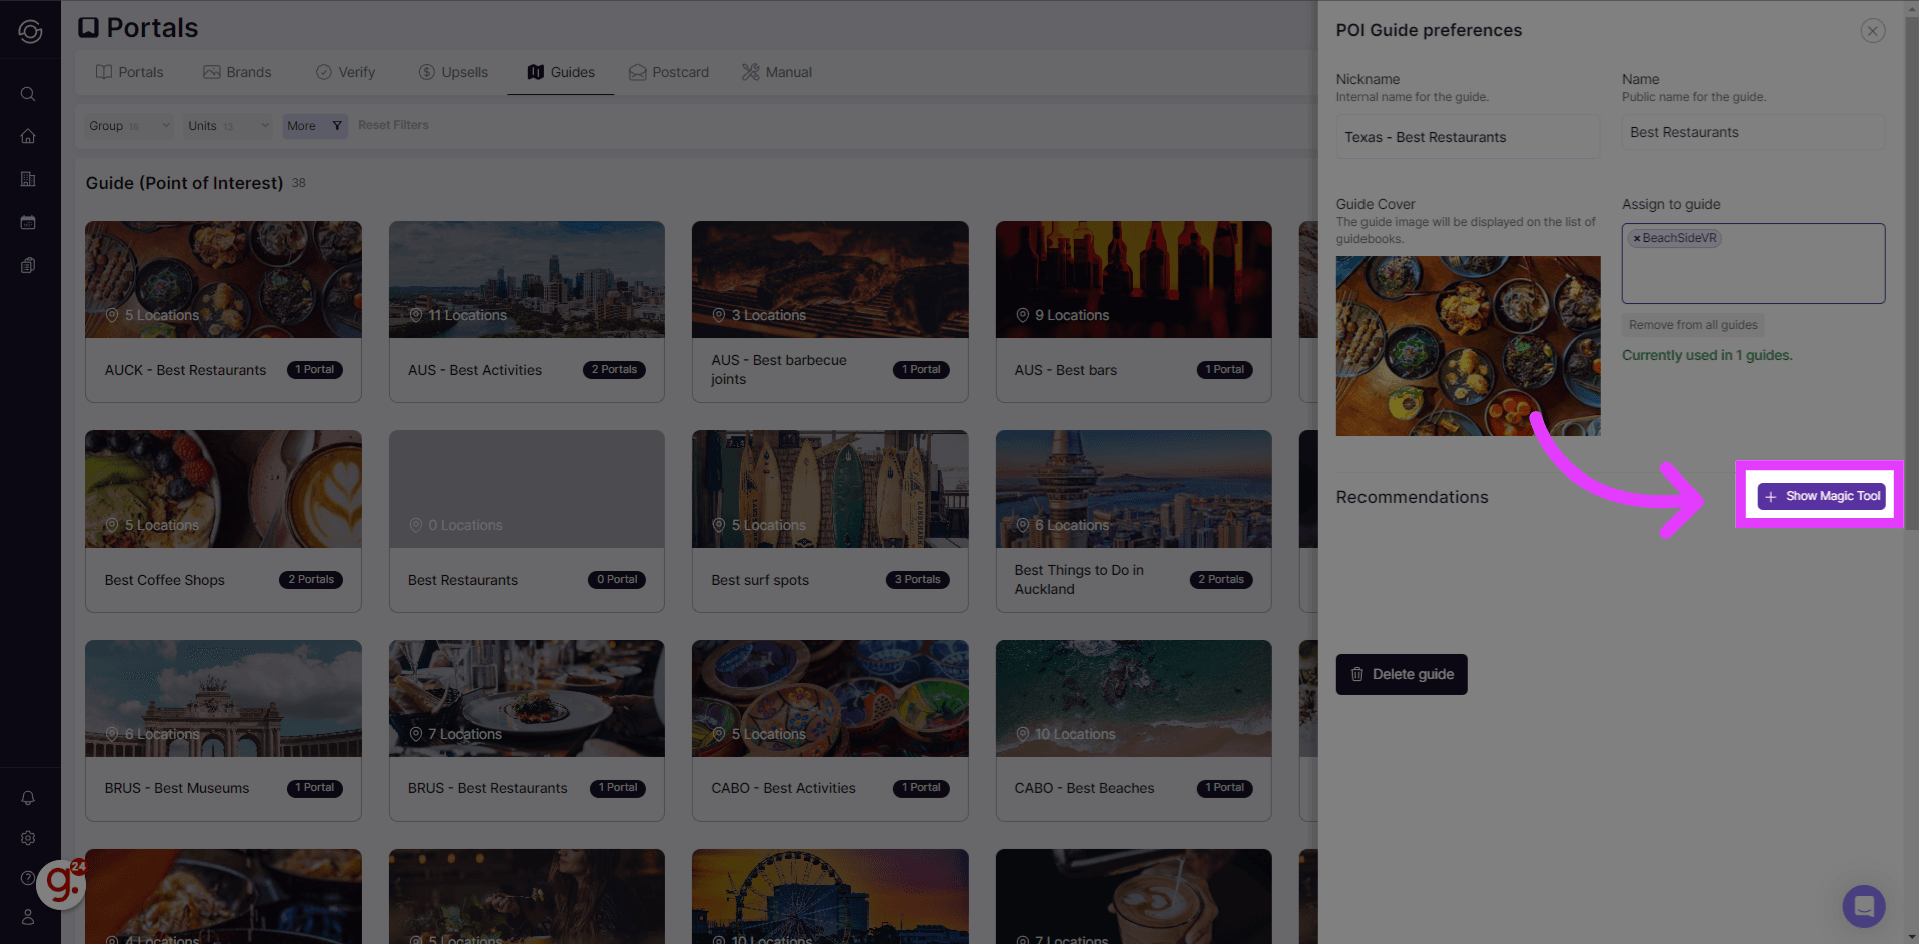
Assign the guide to a Property
Assign your guide to a Property. You can actually assign your guide to multiple properties.
-
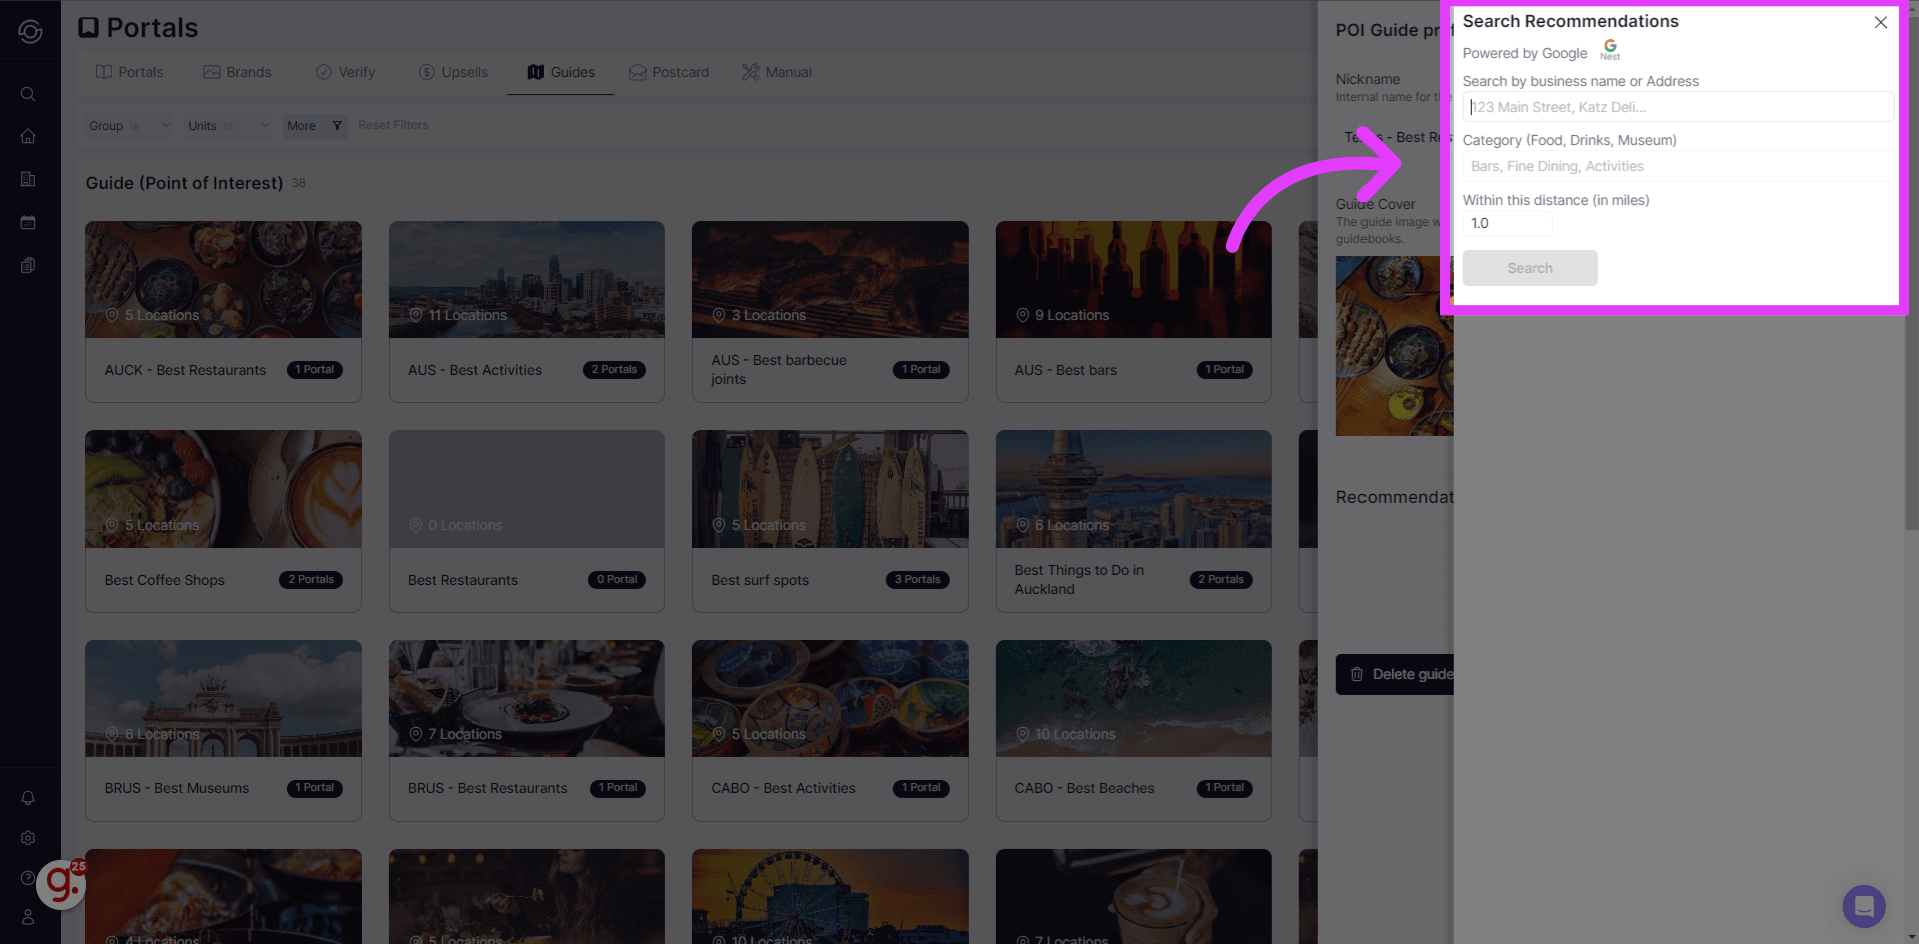
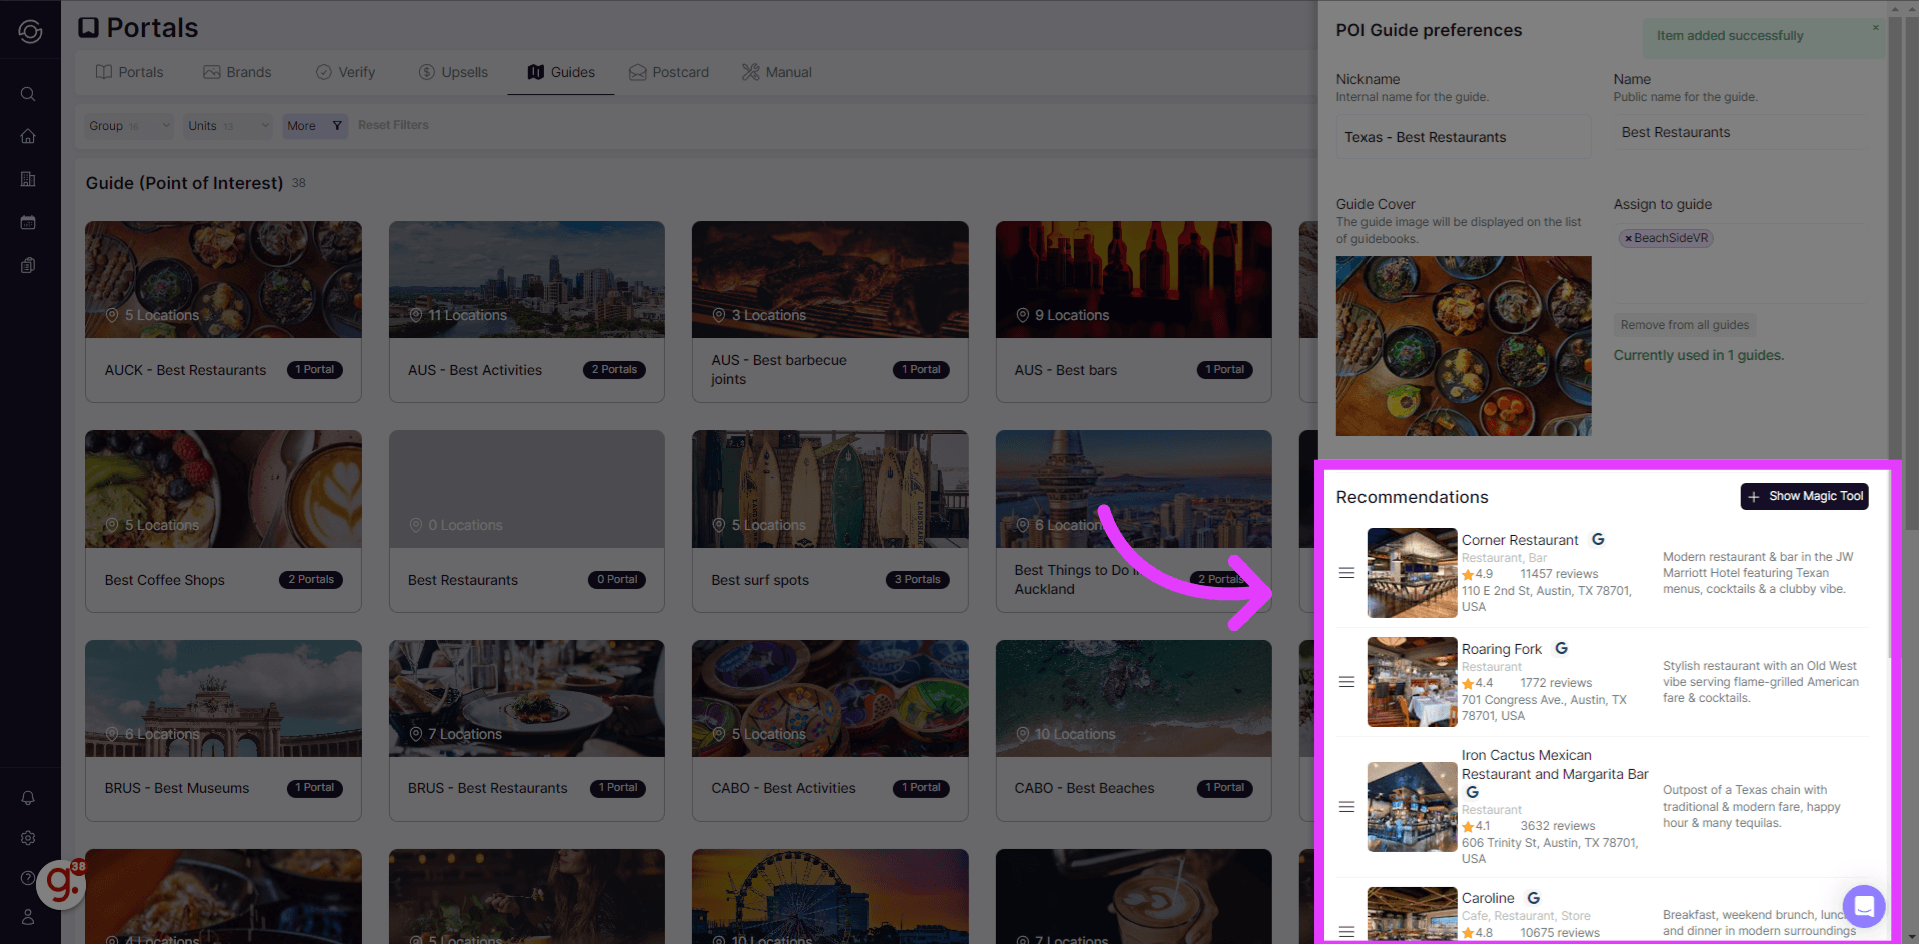
Import from Google
Select the option to Import from Google.
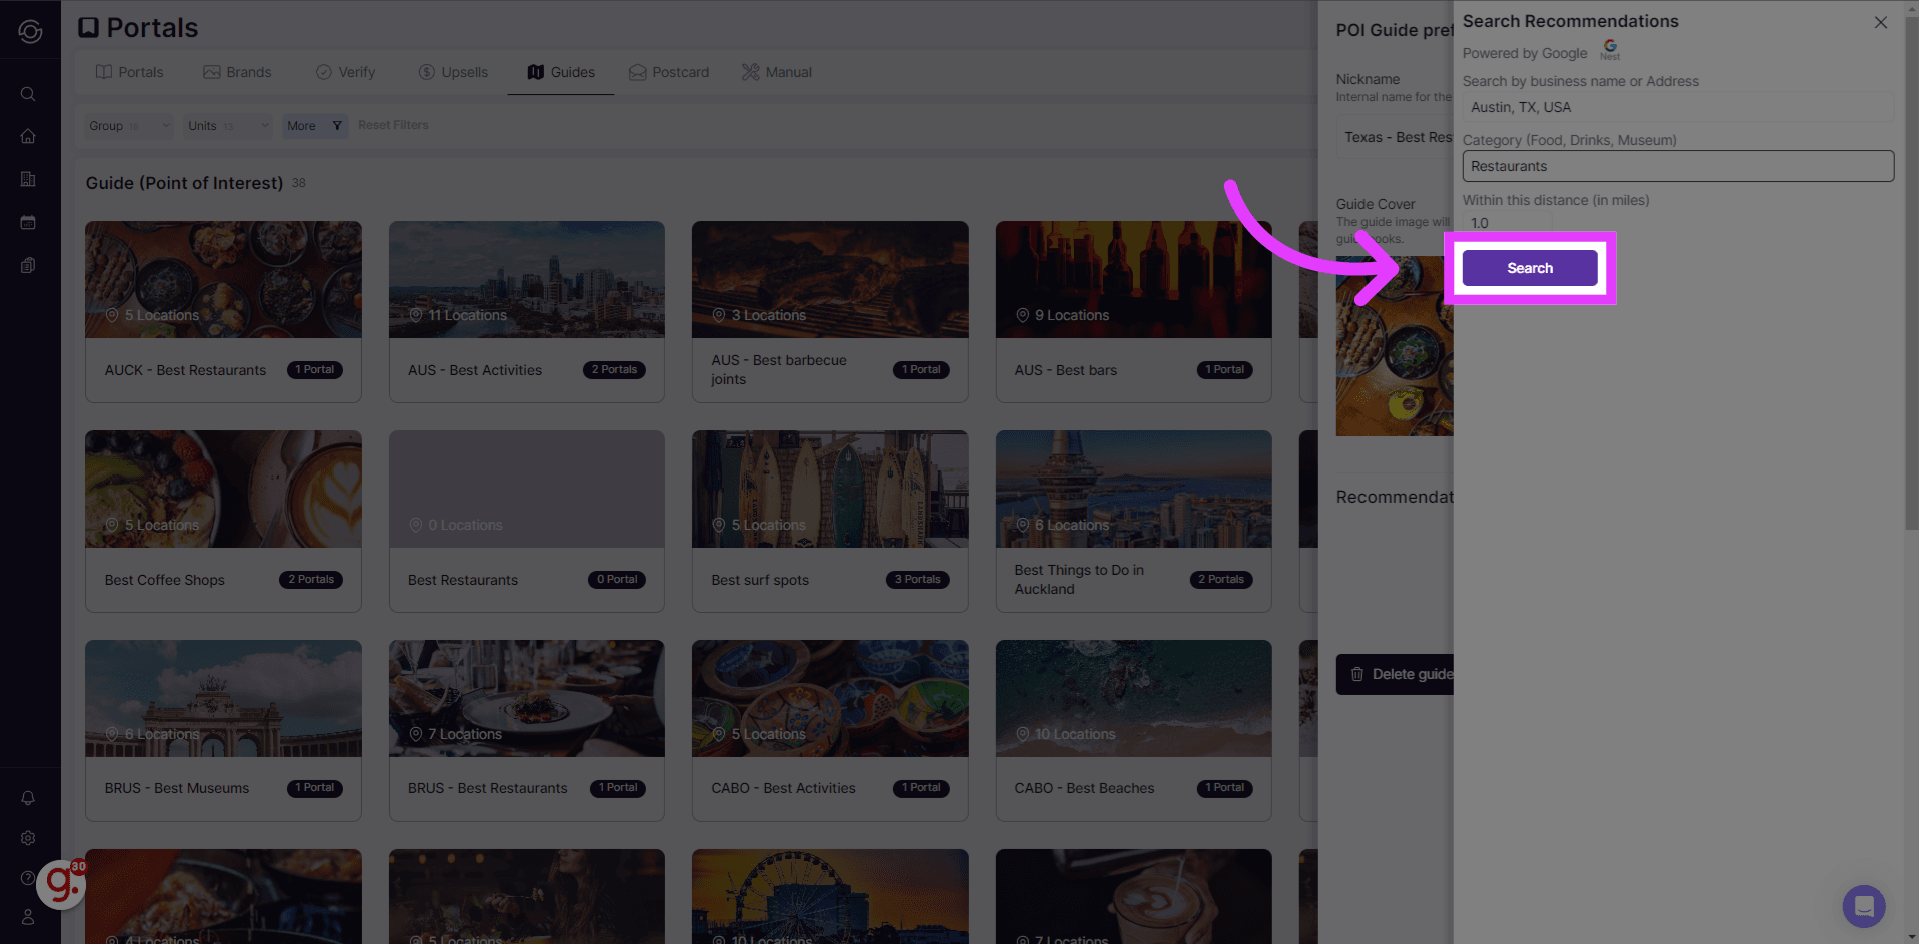
Input the property address and category for the guide to display the recommended options.
Click on the “Search” button to generate results.
The list will feature the suggested options.
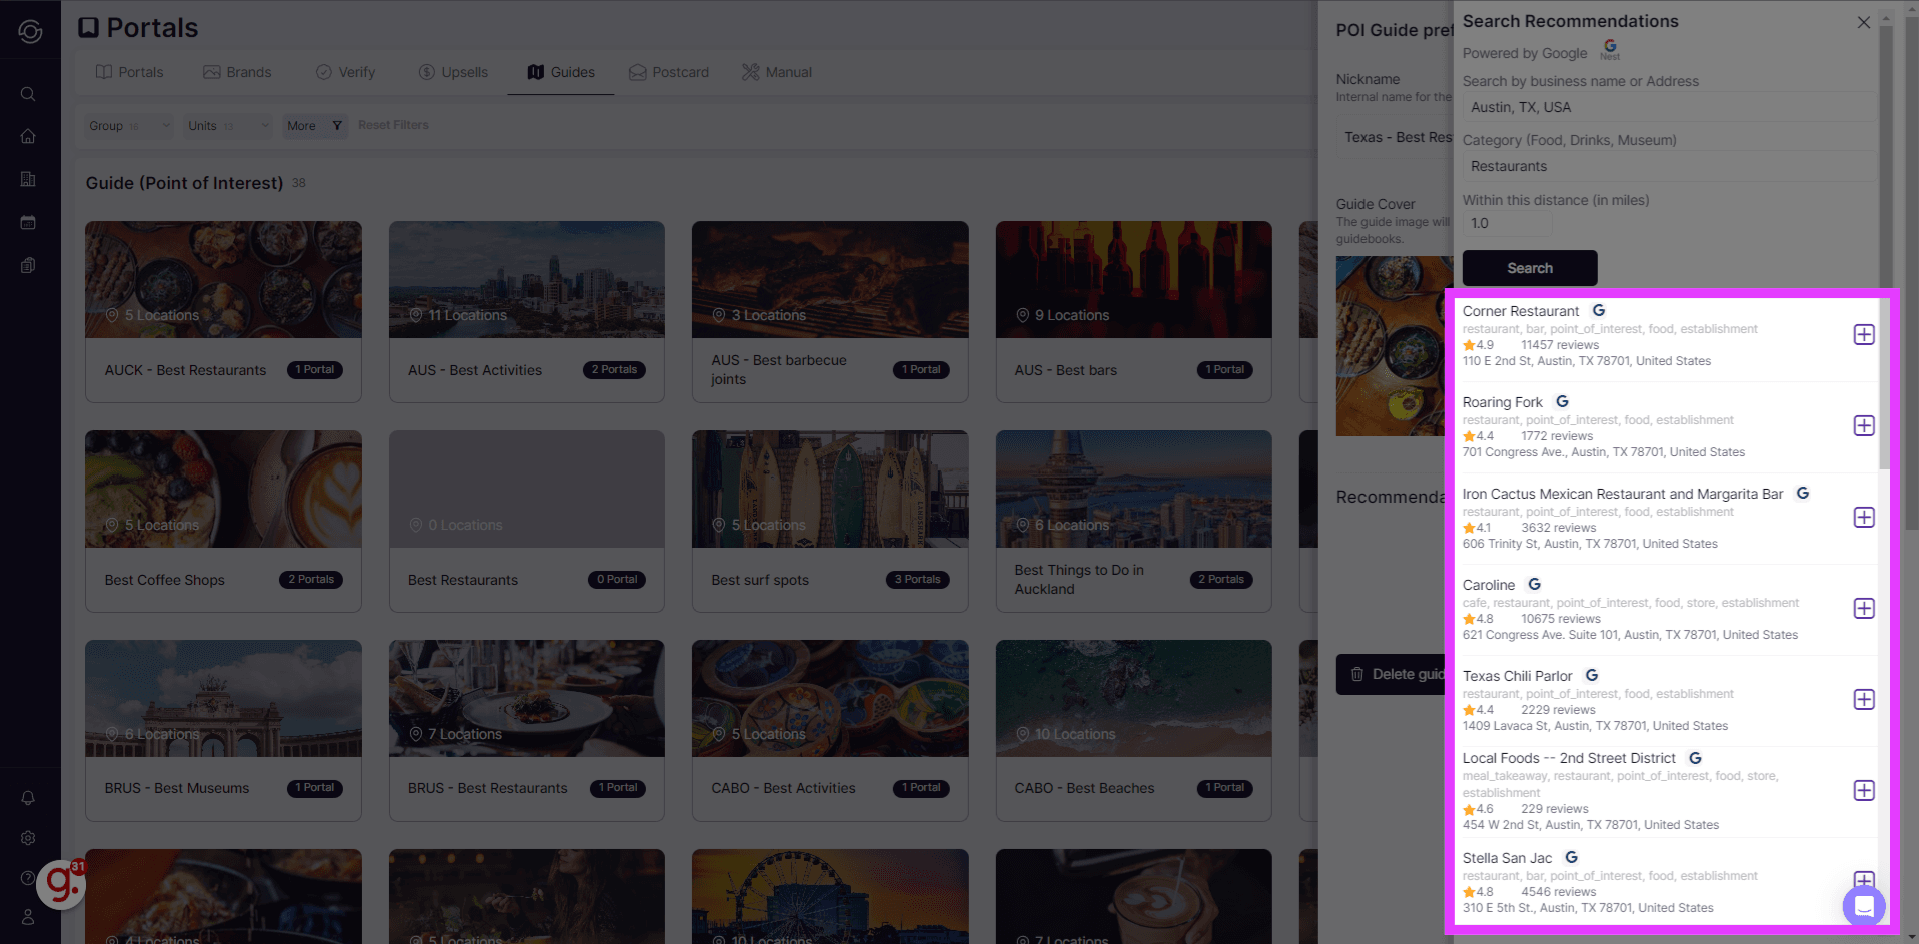
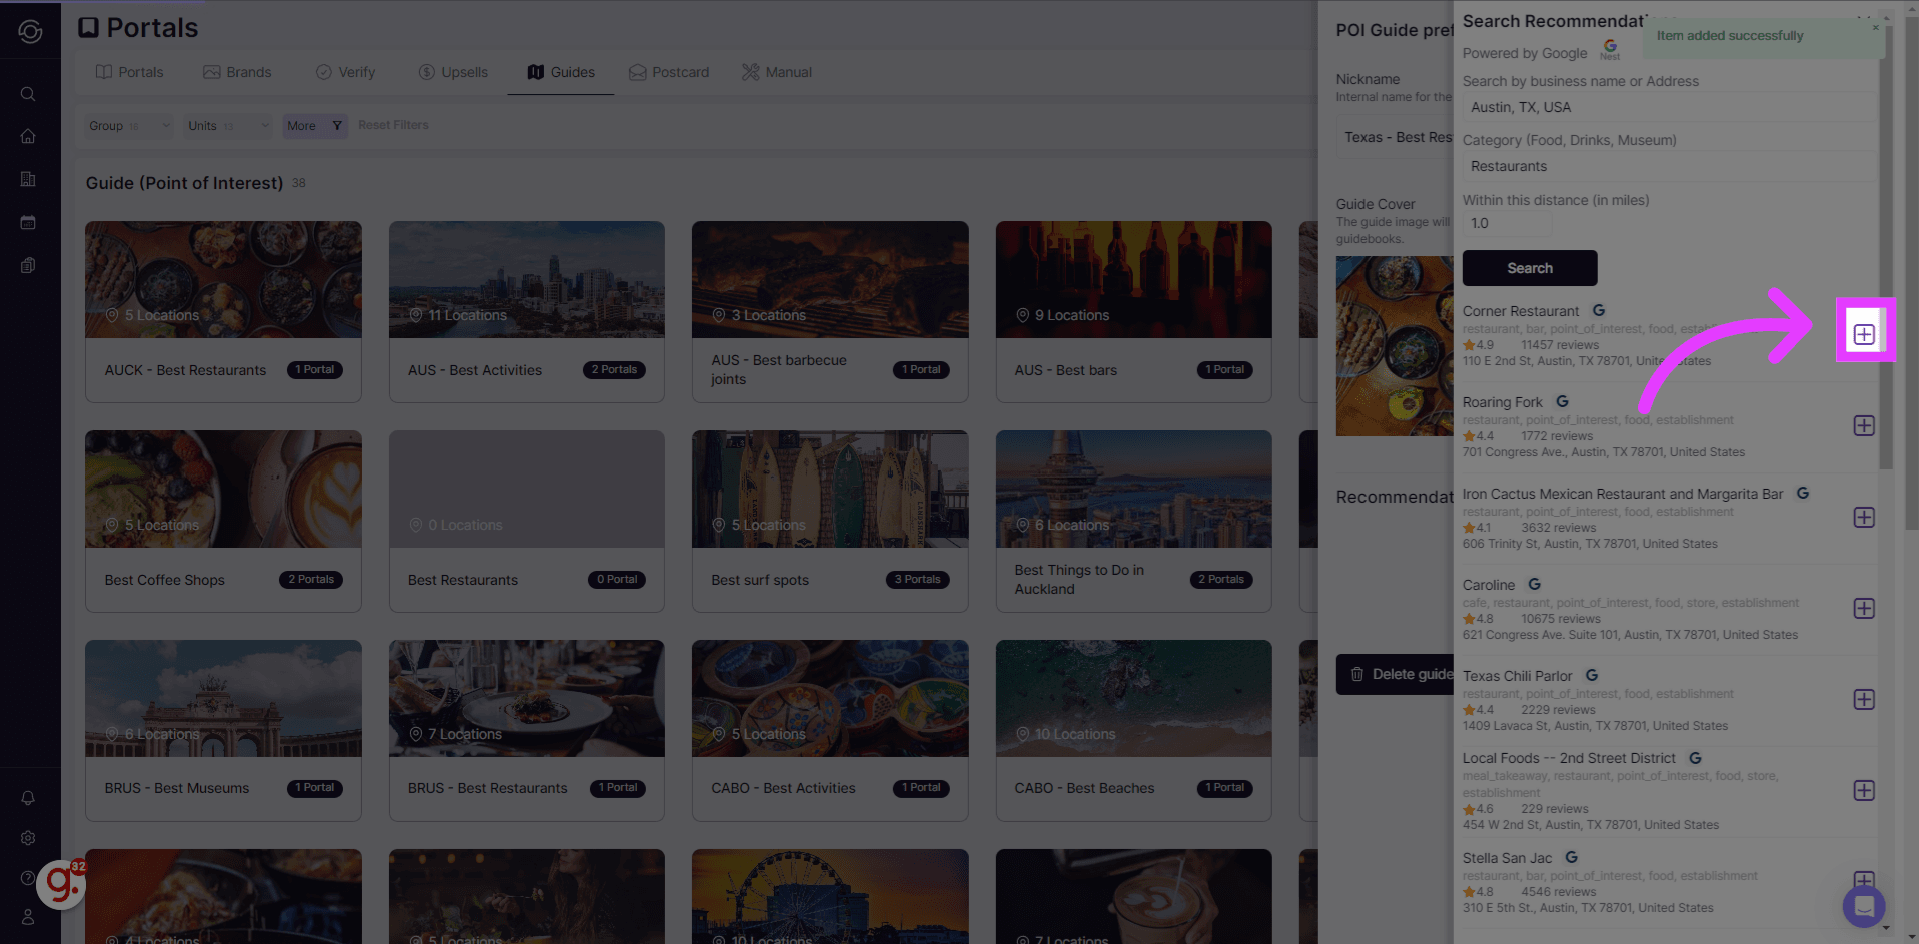
Select the ”+” button to include it in your guide. You can select multiple entries for your guide.
Google returns results in pages. When more matches are available for the same search, a Load more button appears below the list — click it to fetch the next page and keep stacking results onto the current list. Changing the address, distance, or type starts a fresh search.
-
Recommendations List
After completion, click anywhere on the screen, and you will notice that the recommendations are added to the list.
-
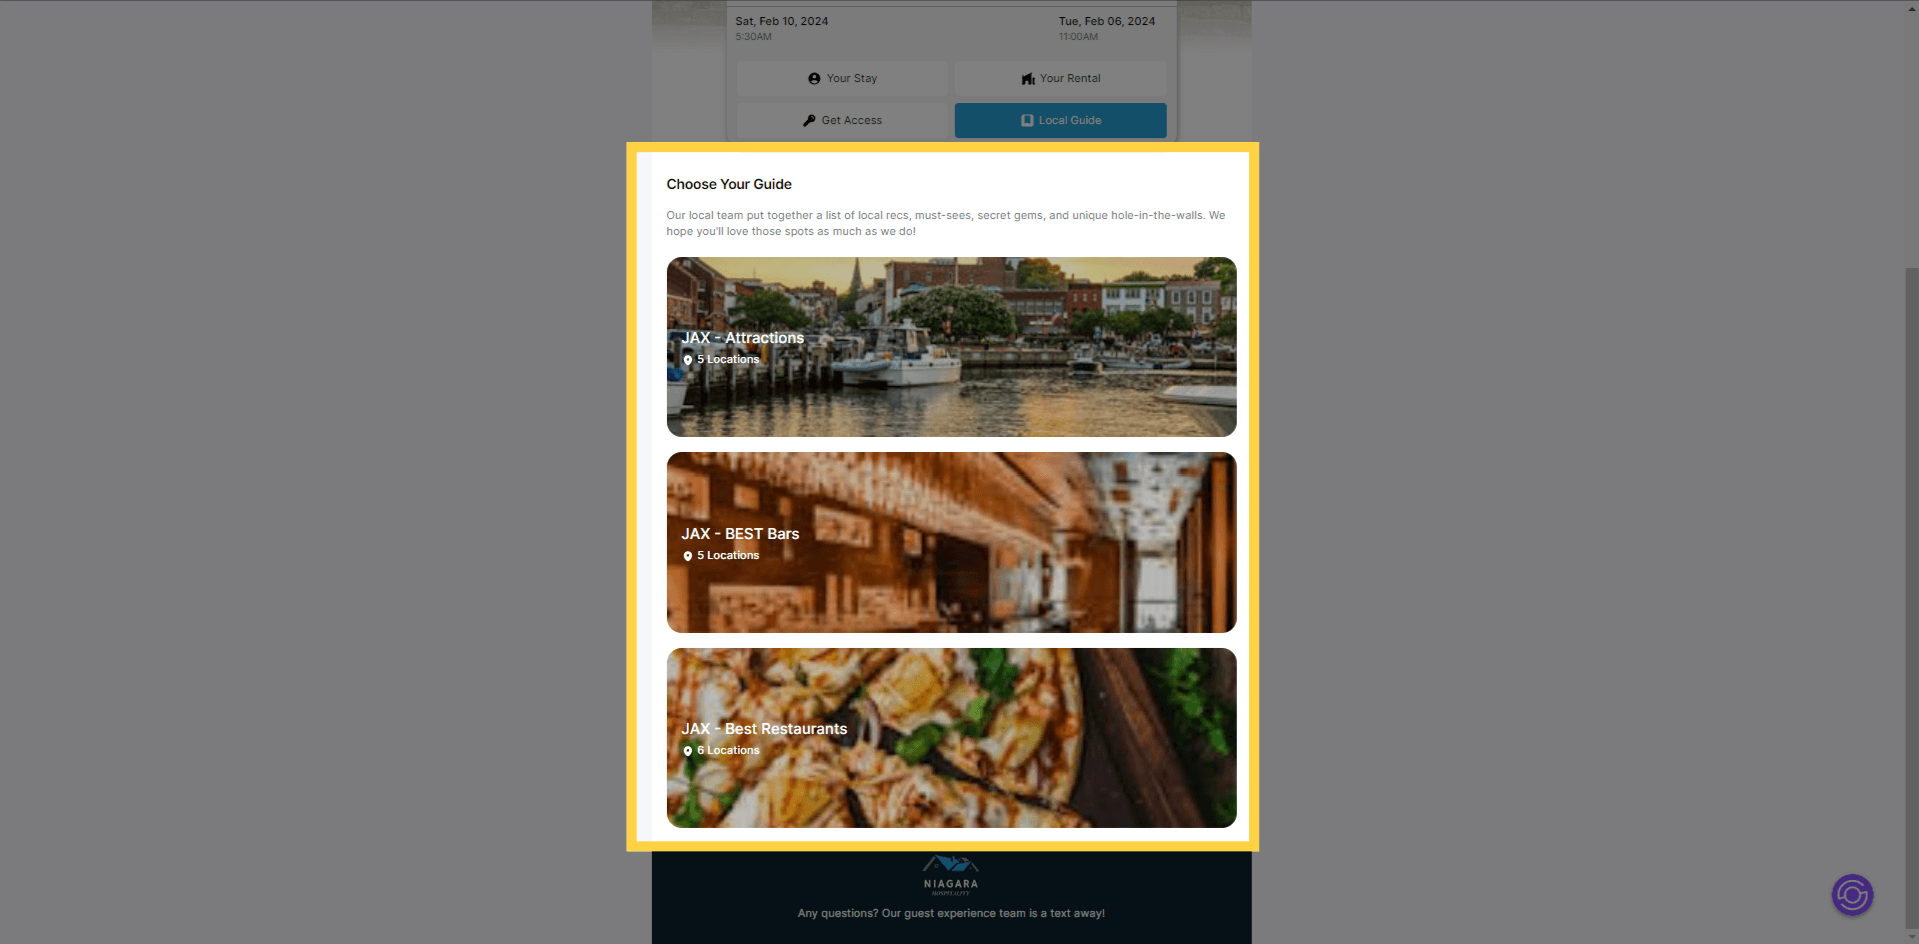
Guest’s view
When the guide is assigned to a portal, this is how it appears from the guest’s perspective.
Reordering guide lists and items
Section titled “Reordering guide lists and items”The Guides tab supports drag-and-drop reordering, which controls the order guests see in the portal.
-
To reorder guide lists, hover the drag handle at the left edge of a row and drag the list up or down.
-
To reorder items inside a guide, expand the list, then drag any item by its handle. The new order saves automatically.
Reordering works with mouse, touch (on tablets, press and hold the handle briefly before dragging to avoid accidental drags), and keyboard (focus the handle, then press Space to pick up, arrow keys to move, and Space again to drop). The order applies to every property the guide is assigned to.
In this tutorial, we’ve explained how to create Points of Interest (Guides) using SuiteOp. Whether you’re adding new guides or personalizing guide settings, you can elevate your guests’ experience by offering them valuable recommendations.