Creating Task Templates
Task templates are the starting point for repeated tasks, such as Cleans and Inspections that happen after each stay. Setting up task templates is simple, the steps to do so are outlined below or watch our set up video.
How to create a task template
Section titled “How to create a task template”-
In the navigation under Tasks, go to Templates. Here you’ll see each of your tasks separated into departments. By default you’ll see 3 departments: Cleans, Inspections, and Maintenance.
-
Under the department you’d like, click** + Create template** to get started
-
Give the template a Name, Description, and Priority
-
Click + Add
How to build task template requirements
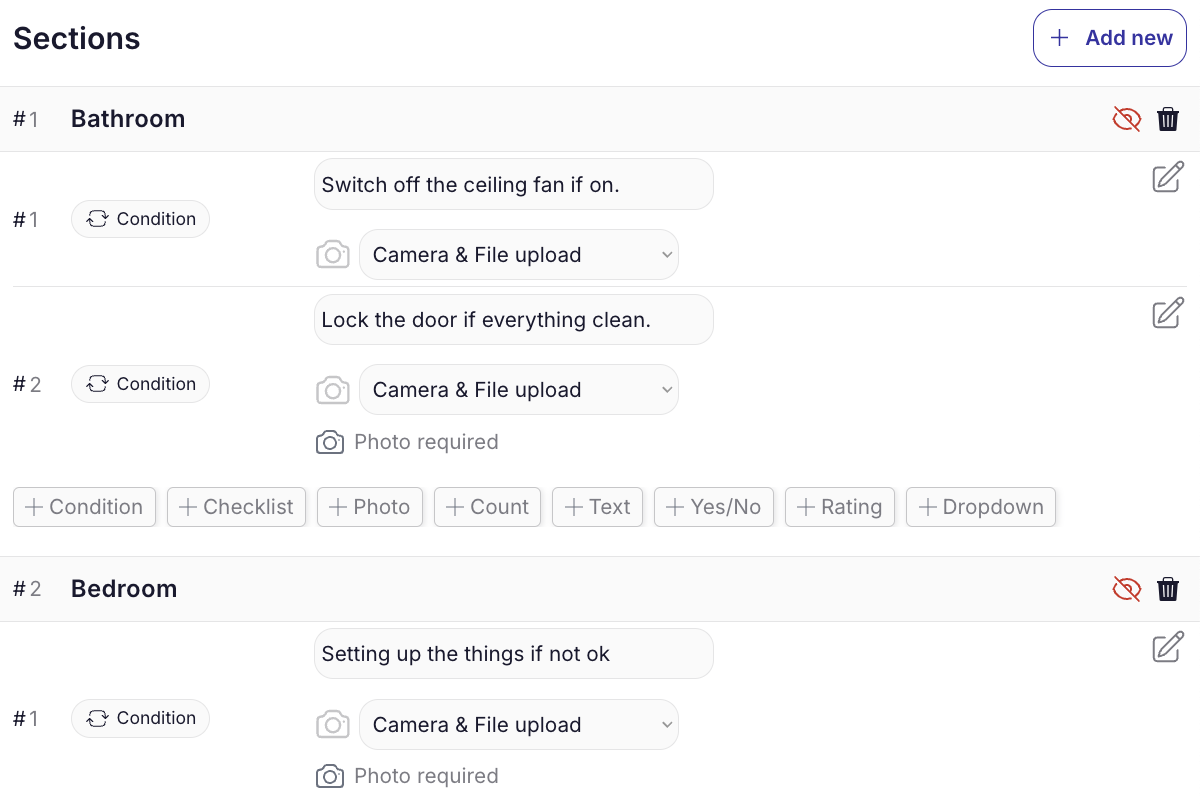
Section titled “How to build task template requirements”Now that your template is created, it’s time to add the requirements. Find the template you just added and select it to start building. You’ll build the template using Sections. Each section is a room or location which you then add requirements within.
-
Choose a room to start and press Submit, this will add the section to your template
-
Next, choose a requirement type to add, these can be checklists, photos, star ratings, counts, text fields, or custom drop downs. Save each section by clicking the green checkmark.
-
Continue adding requirements, and repeat the process for each room
-
If you need to reorder sections, you can drag and drop from the left side and click the section title to collapse for easier viewing. You can even reorder checklist items by dragging & dropping!
What if I have multiple bedrooms & bathrooms?
Section titled “What if I have multiple bedrooms & bathrooms?”Bedroom & Bathroom sections will be multiplied based on the property listing. If the property assigned to a task has 3 bedrooms and 2 bathrooms, then the task will show a Bedroom section three times (Bedroom 1, Bedroom 2, and Bedroom 3) and a Bathroom section twice (Bathroom 1 and Bathroom 2). This is based on the Elements on the property and can be updated on each property.
Do I need to make separate templates for every property?
Section titled “Do I need to make separate templates for every property?”No, even if some properties have different rooms, you can still use one template! We use Elements* on each property to determine which** Sections** of the task template should be included on a task for that property. You can update your property’s elements on each property’s settings > Property tab in the Elements section.
For example if two properties have a pool, but the others don’t, you can still add a section for Pool to your task template, and this won’t be added to tasks for properties without a Pool listed in their Elements.
How to add custom dropdown options for task requirements
Section titled “How to add custom dropdown options for task requirements”
-
Click + Manage custom options
-
Click Add new
-
Name your Option set
-
Add the options
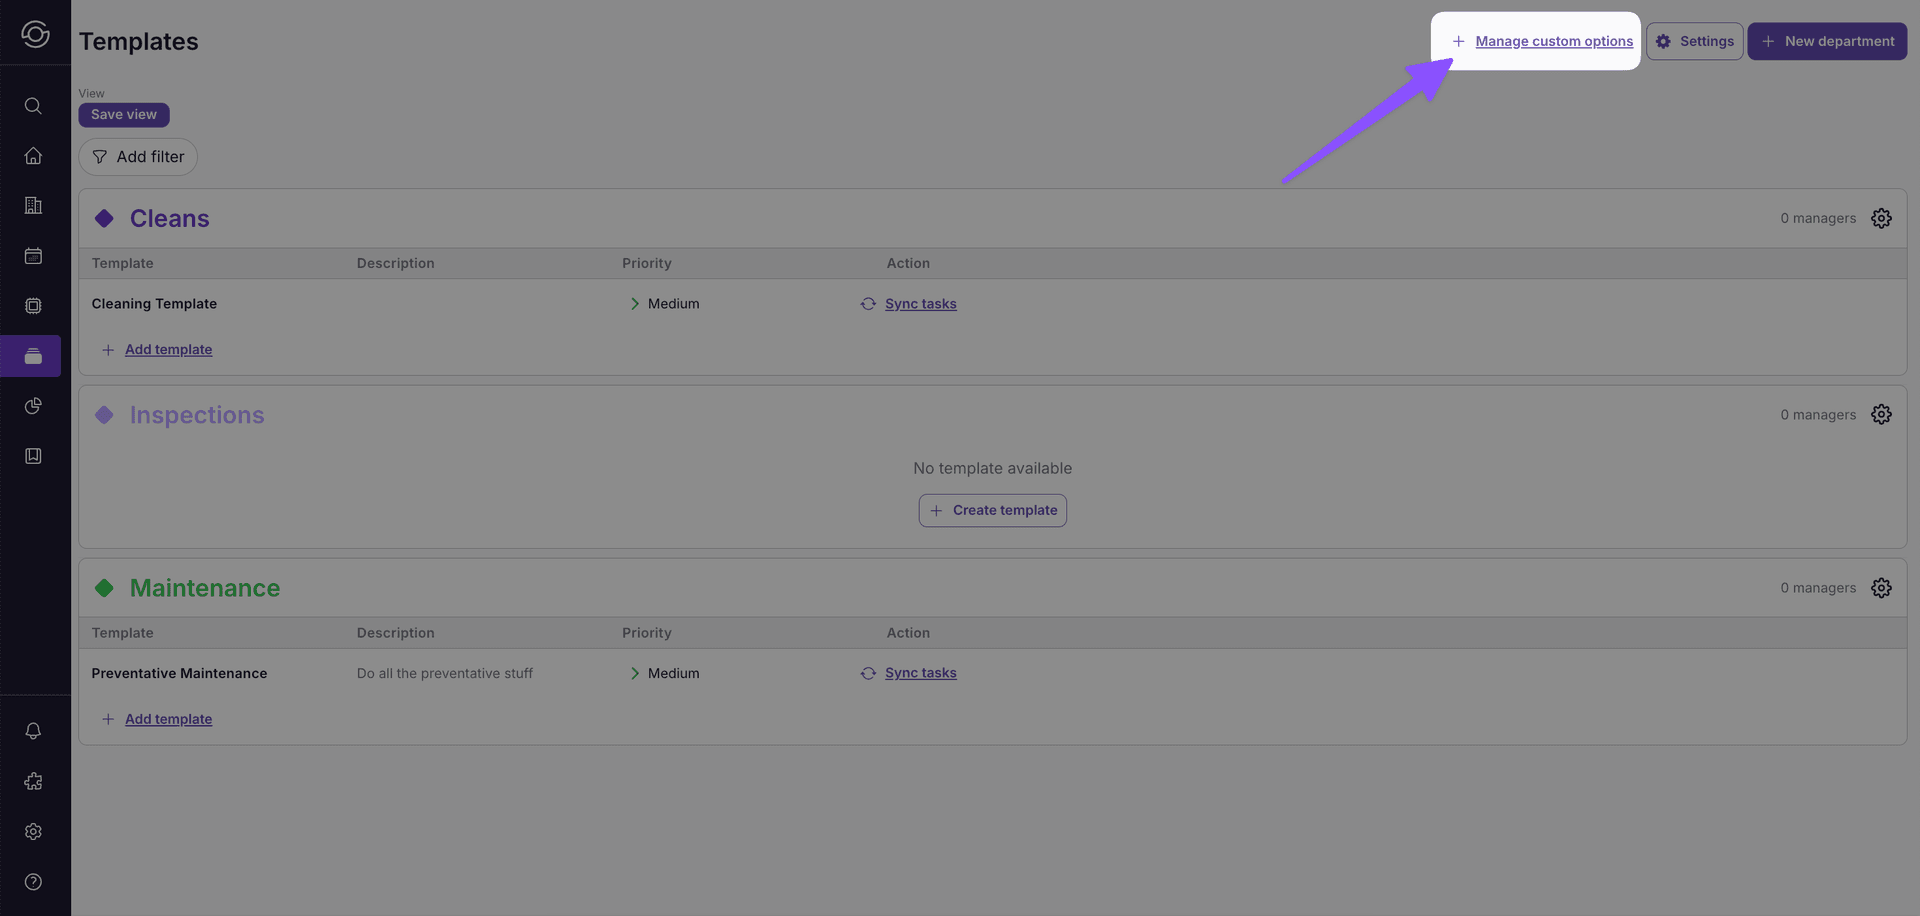
Photo requirements and AI verification
Section titled “Photo requirements and AI verification”When you add a Photo requirement, SuiteOp can automatically grade the uploaded photo against a prompt you write — no manual review needed for clean shots, and a flag the moment something looks off.
Configure AI photo verification
Section titled “Configure AI photo verification”Inside a section, edit a Photo requirement and turn on the AI Photo Verification toggle. A textarea appears where you describe what a passing photo should look like — be specific about what the AI needs to see.
Example prompts:
- “The living-room sofa should be tidied: cushions plumped and lined up, no visible trash, blankets folded.”
- “All knobs on the stovetop should be in the OFF position and the countertop should be wiped clean.”
- “The bedside table should be empty — no guest belongings, no drinkware, no debris.”
The AI is biased to flag rather than pass when there’s any reasonable doubt — a false flag costs a quick manual review, but a false pass would let an issue reach the guest.
What the assignee sees
Section titled “What the assignee sees”On the task itself, the photo requirement shows the prompt as a hint so the team member knows exactly what’s being checked. After they upload a photo:
- AI verifying… — verification is in flight
- AI verified — the photo passes the prompt
- AI flagged — something looks off; the reason from the AI shows beneath the photo so the reviewer can decide what to do
If the verifier can’t reach an answer after retries, the requirement falls back to “AI verification unavailable — please review manually” and the task continues without an automatic verdict.
Photo requirements without an AI prompt behave exactly as before — the assignee uploads photos and no verdict badge appears.